Article Content
Overview
A user can edit a user profile by changing the user's first name, last name, or email address. They can also delete a user profile from the system.
User Account Requirements
The user account you use to log into Resolver must have advanced permission to edit or delete a user profile.
Navigation
- From the Home screen, click the System Icon.
![]()
System Icon
- From the Admin Overview screen, click the Users tile under the People section.
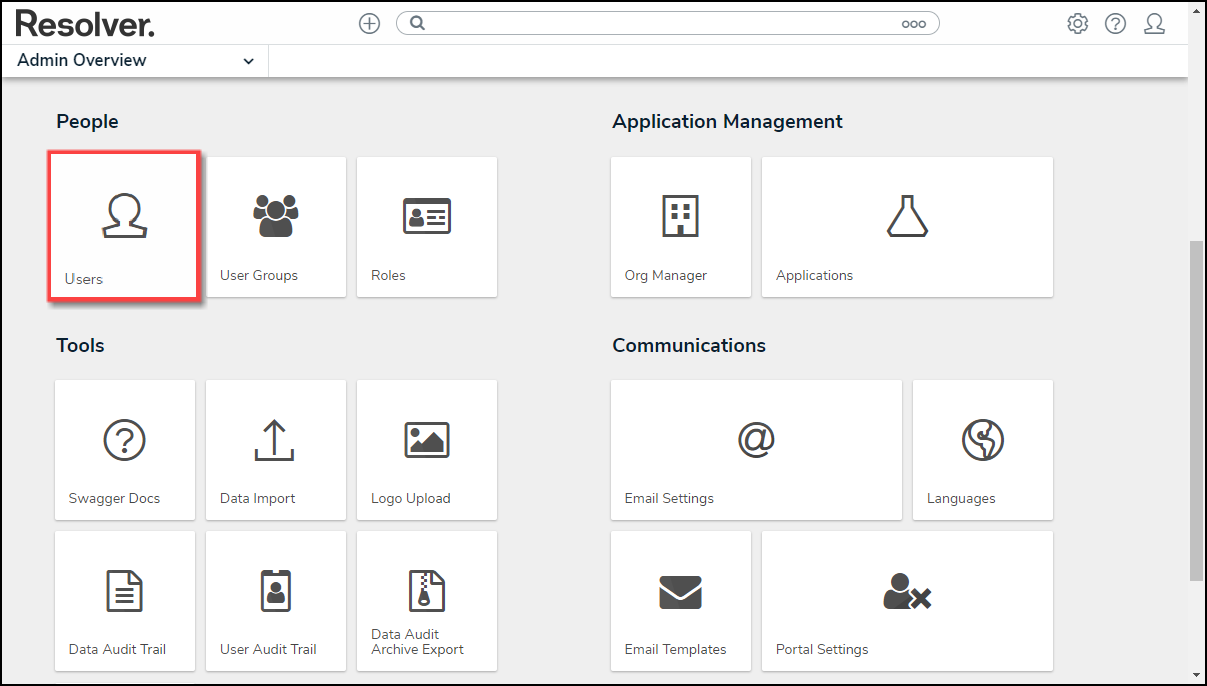
Users Tile
- Enter a User's Name in the Search field to narrow the search results.
- Click a User Name.
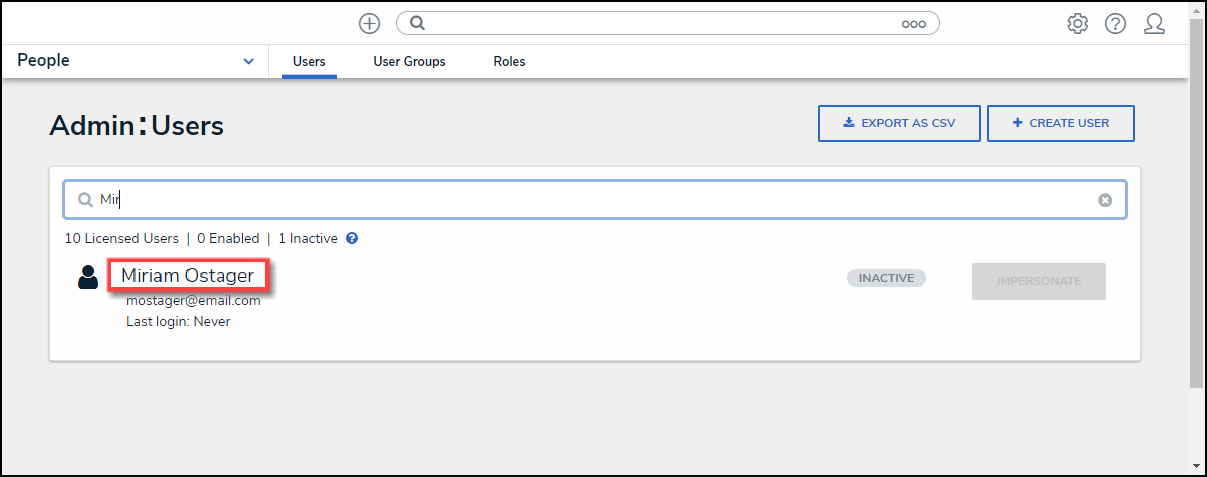
User Name Link
Editing a User
- From the Admin Edit User screen, an Administrator can edit the following fields and toggle switches:
- First Name: Click the First Name field to change to the User's first name.
- Last Name: Click the Last Name field to change to the User's last name.1
-
Email Address: Click the Email Address field to change the User's email address.
- An Administrator is a member of all the same Orgs as the user. The email address change will take effect immediately.
- An Administrator is not a member of all the same Orgs as the user. The User is moved to a Pending state and must click a Verification link for the changes to take effect. The Administrator can also Resend Email Confirmation or Cancel Changes.
- The User is logged in to the system. The User will see a system notification at the top of their screen, indicating Email Updated.
- The User is not logged in to the system. The User will be redirected the next time they log in. The user must log in using their original email address on the redirected screen. On successful login, the user will see an Email Updated confirmation message.
- User Enabled: Select the User Enabled toggle switch the enable (blue) or disable (grey) a User Profile.
- Admin: Select the Admin toggle switch to enable (blue) or disable (grey) Administration permissions.
- All Access: Select the All Access toggle switch to enable (blue) or disable (grey) all access, granting the User access to all Object Types and Object within an Organization.
- Language: Select a Language preference from the dropdown menu to change the system's language setting. Before you can set an alternate language setting, an Administrator must download a languages .csv file from the system, map language translations to the user interface text, and upload the .csv file for use within Resolver.
Note:
The default language setting in the User's browser will precede Resolver for language translations.
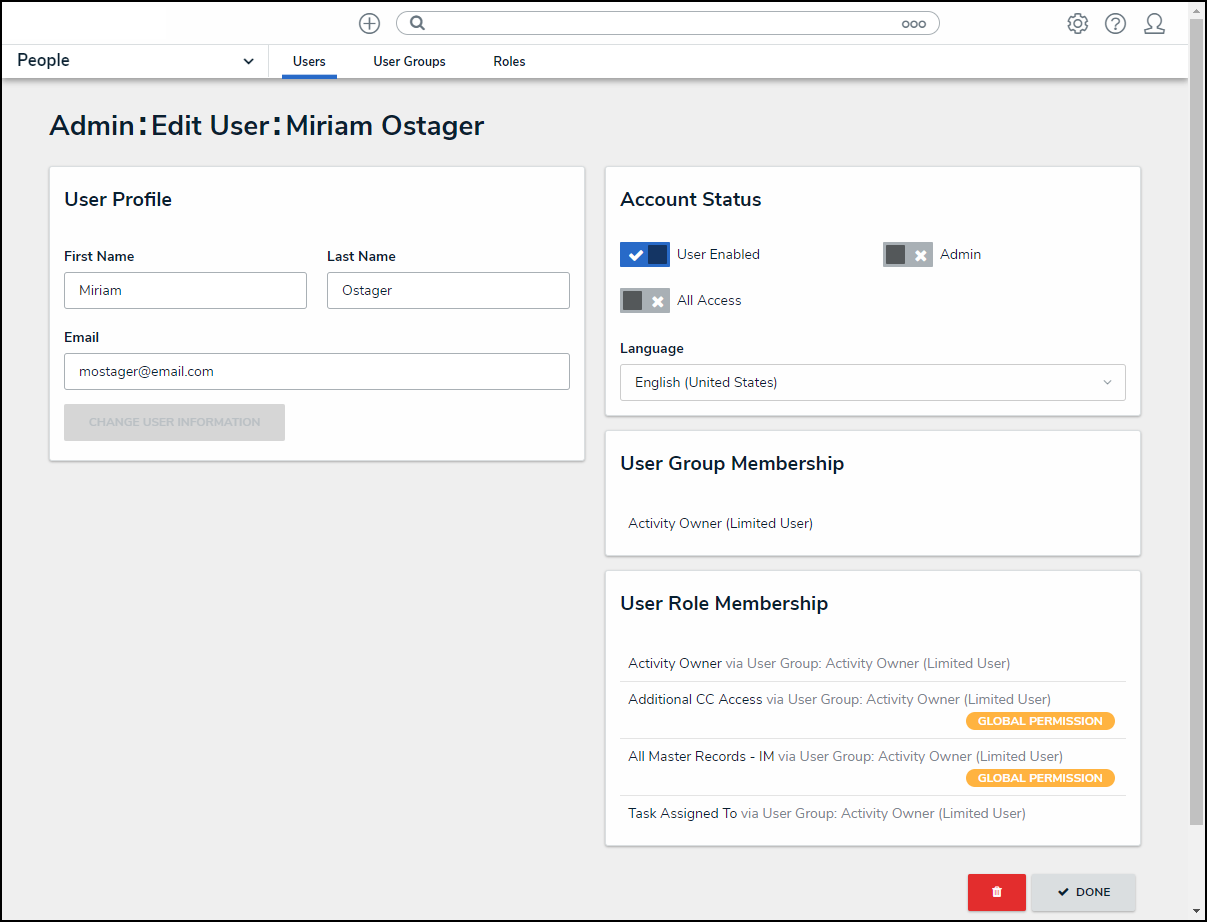
Admin Edit User Screen
- The User Group Membership section shows the User Groups the User is enrolled in. Click on a User Group to open the Admin Edit User Group screen to view further details, remove, and add a User to the User Group.
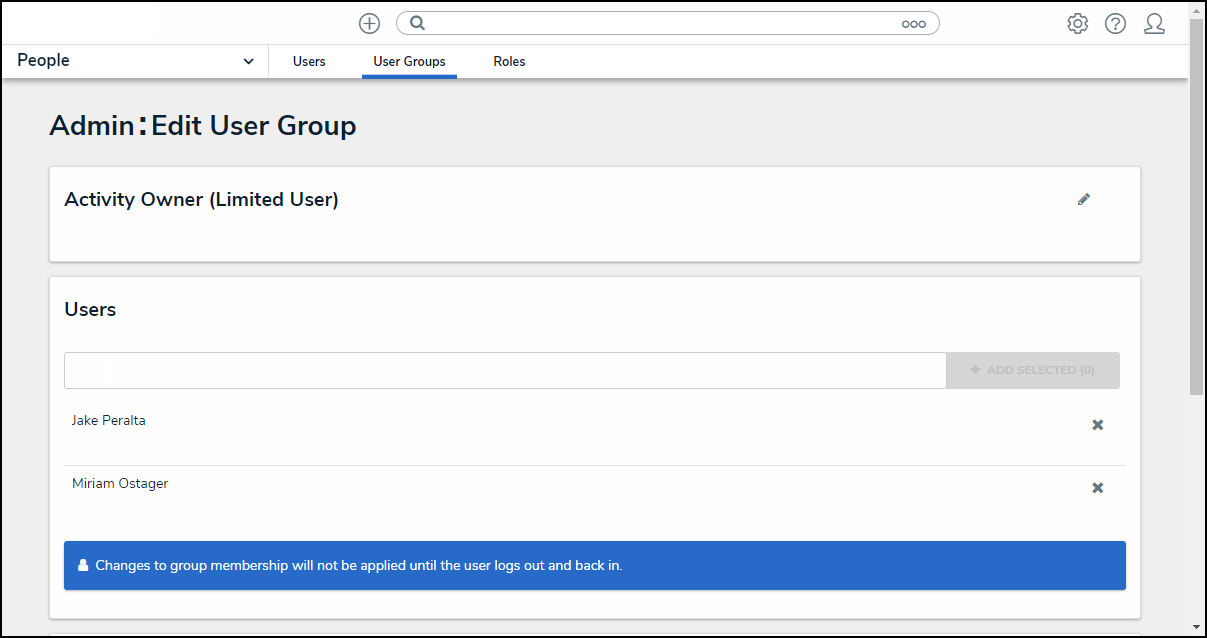
Admin Edit User Groups Screen
- The User Role Membership section shows the Roles the User is enrolled in. Click on a Role to open the Admin Edit Role screen to view further details, remove, and add a User to a Role.
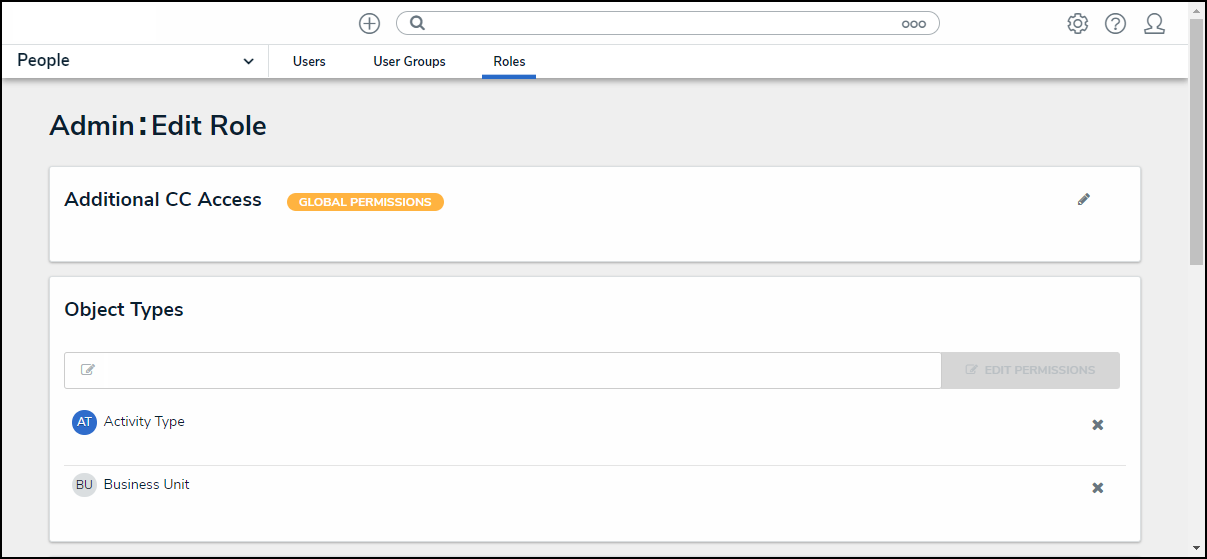
Admin Edit Role Screen
Deleting a User
Deleting a user account prevents the user from logging into your organization and accessing any data. It removes that user from any objects they were assigned via a role, which may affect your reporting. Deactivating an account prevents the user from logging in and accessing data, but the user is not removed from any assigned objects, thus maintaining your records.
- Click on the Delete button to delete the user profile. Deactivating a user account is better than deleting them to avoid impacting any existing role and assignment configurations (and their associated workflows). Disabled Users are not counted towards your maximum user count.
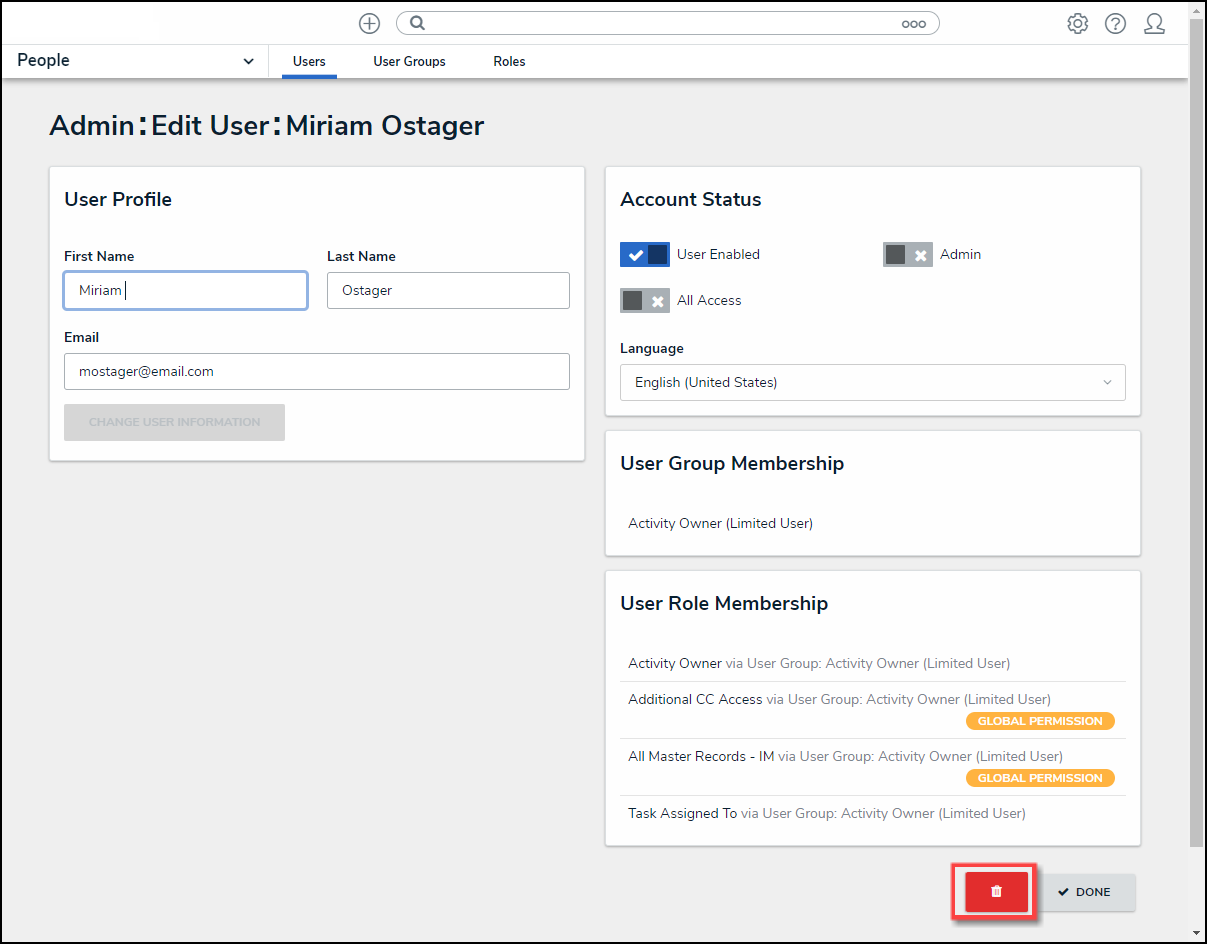
Delete Button
- A Delete Confirmation screen will appear, asking if you want to permanently delete the User from the system.
- Click the Yes button to confirm.
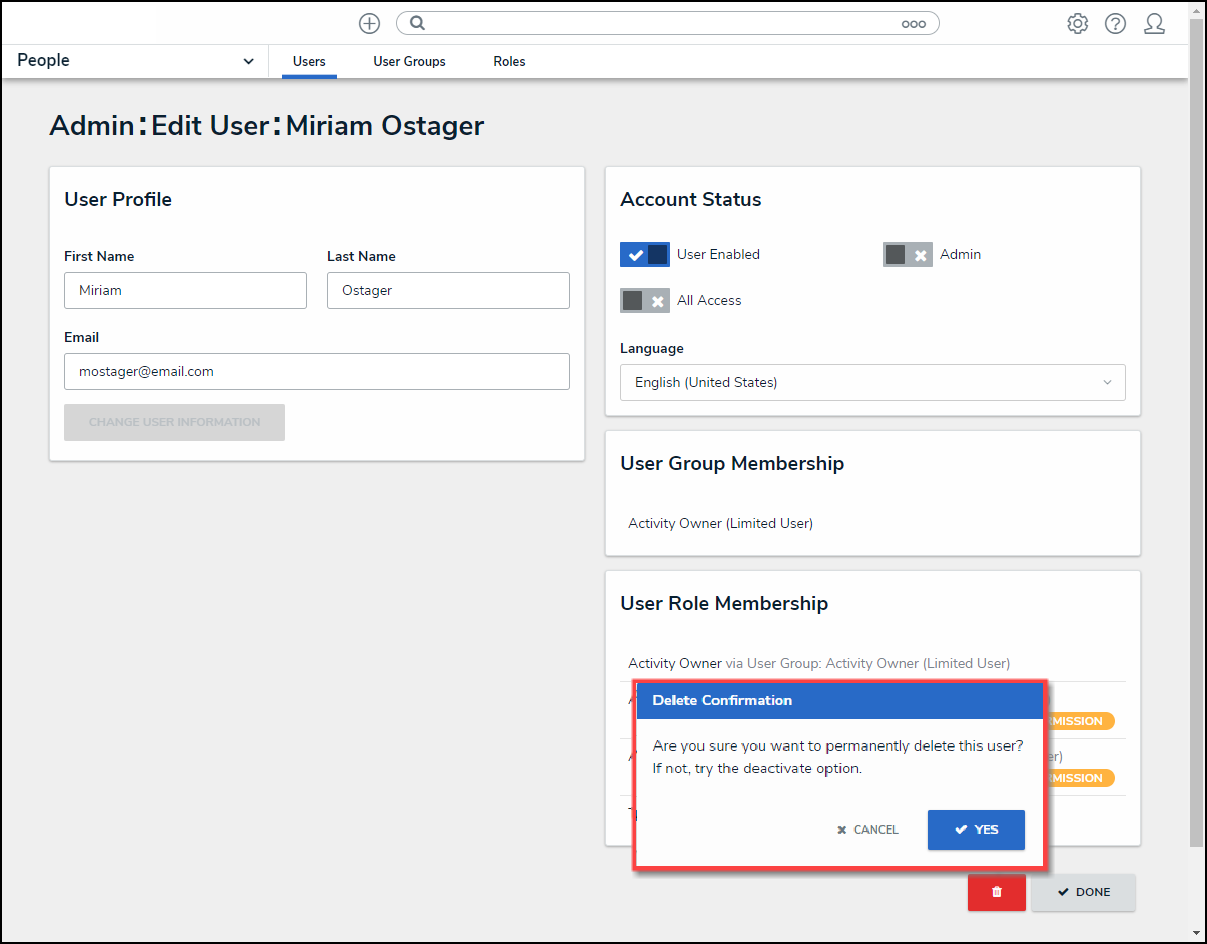
Delete Confirmation Screen